Hexo Blog Customization
This introduces the comment system and some custom configurations
Comment Functionality
Register a LeanCloud International Account (In China, domain binding and filing are required)
Registration link: 👉https://console.leancloud.app/login.html#/signup
Afterwards, create an application with any name.
In the settings, find the application keys and copy the appid and appkey into the corresponding configuration in Hexo. Since this article focuses on email reply functionality, this part will not be elaborated further 😝. Let's get straight to the point.
-
Modify the email template
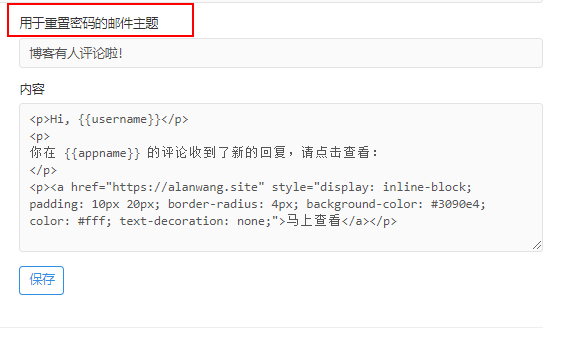
<p>Hi, {{username}}</p>
<p>You have received a new reply to your comment on {{appname}}, please click the link below to check:</p>
<p>
  <a
    href="https://alanwang.site"
    style="display: inline-block; padding: 10px 20px; border-radius: 4px; background-color: #3090e4; color: #fff; text-decoration: none;"
    >View Now</a
  >
</p>
Deploy Valine-Admin
First, perform the configuration
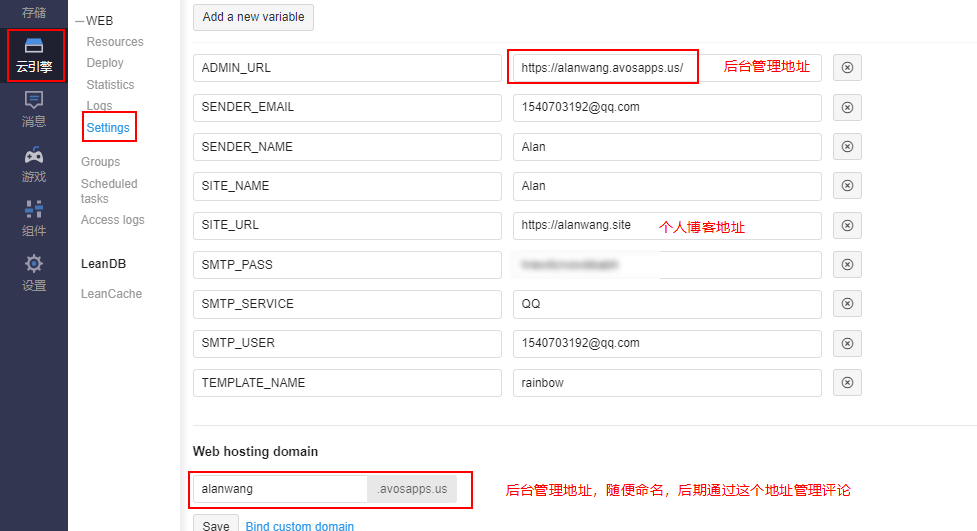
For more configuration options, refer to: https://github.com/DesertsP/Valine-Admin
https://github.com/DesertsP/Valine-Admin.git
I have also tried the version by zhaojun1998 online, but it will give an error when deployed in the international version. Based on the error message, it seems that the node version is too low, and even if the deployment is successful, the backend cannot be logged in. I have tested this version and it has no issues.
The default deployment branch is master
Click on deploy to proceed
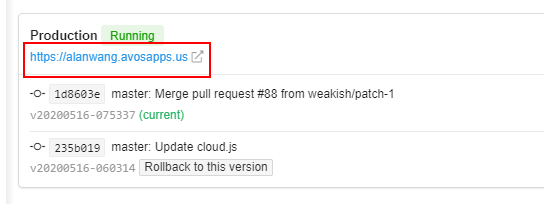
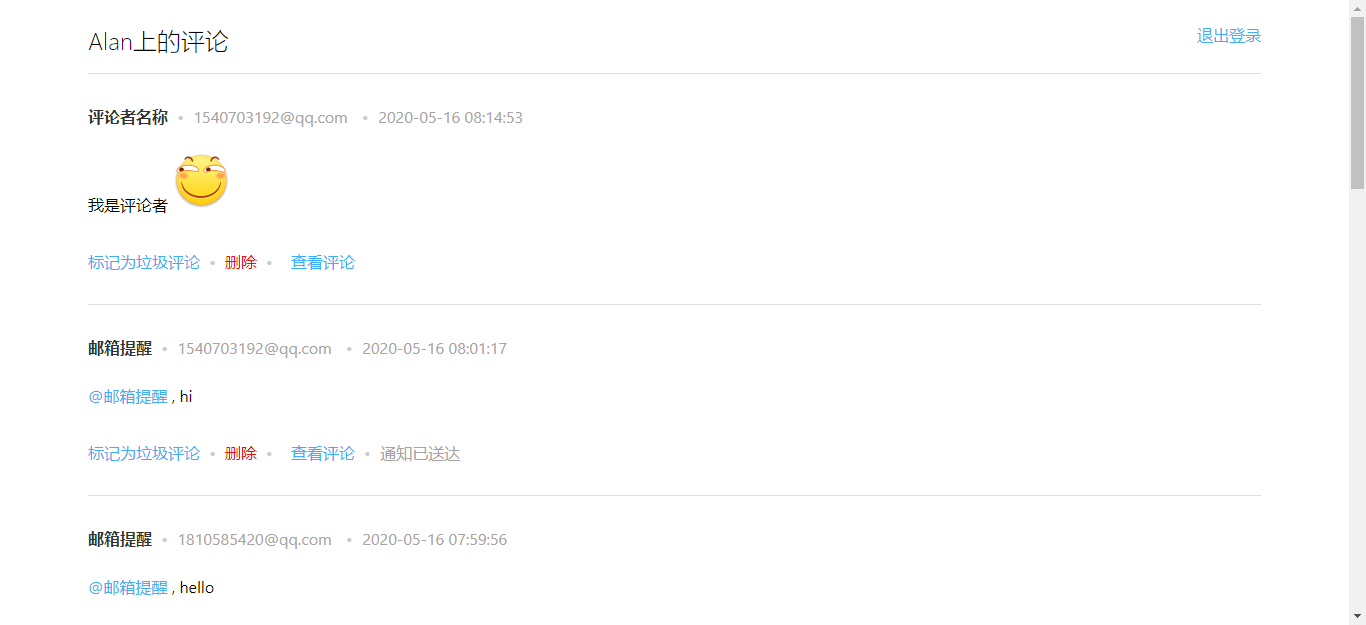
Click on the link to access the backend management system (here, you need to create a username and password by yourself in the _User in Storage)
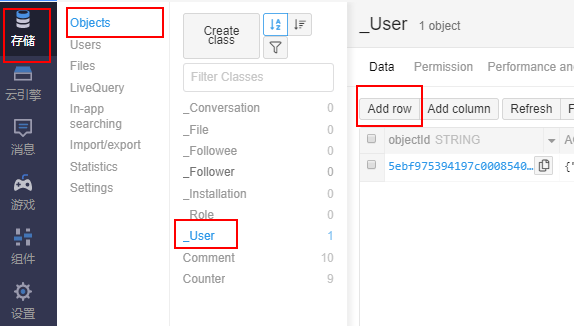
Here, you only need to fill in the username, password, and email. After adding them, you can successfully log in to the backend management system with the email and password.
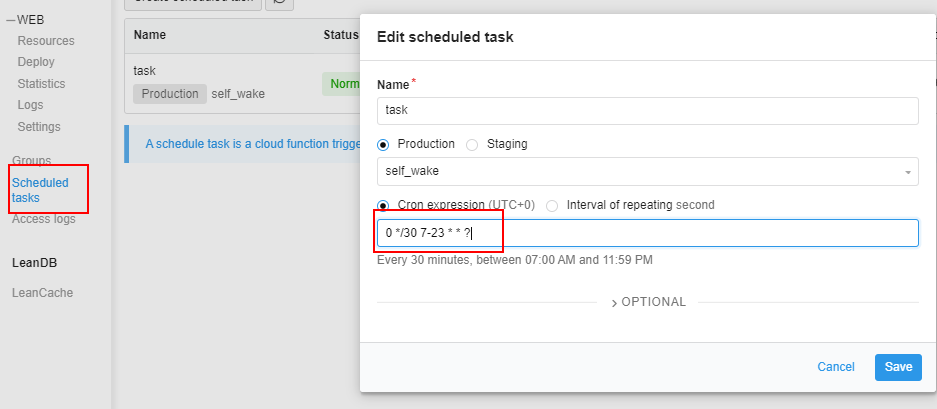
Set up scheduled wake-up
0 */30 7-23 * * ?
Add Baidu Analytics
Complete the following steps
- Register a Baidu Analytics account
- Copy the analytics code
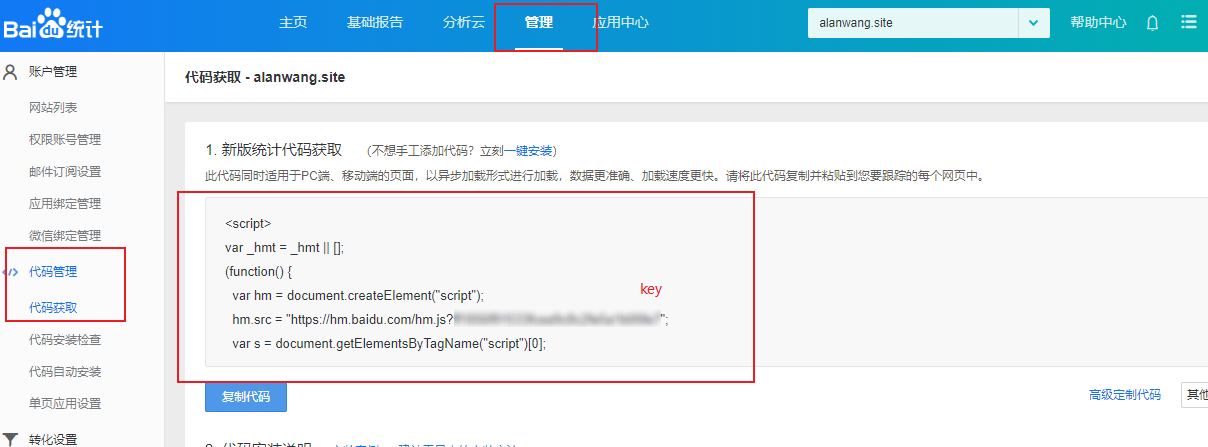
- Paste the code into footer.ejs under
G:\blog\themes\volantis\layout\_partial - Configure
G:\blog\_config.yml
baidu_analytics_key: the key value in the image above
- Check if the configuration was successful
You can directly use the code inspection on the official website to check. If it doesn't work, you can use the following method.
Check the network console to see if your website has requests starting with hm. If there are, it means that the configuration was successful, and you will be able to see the data in Baidu Analytics after about 20 minutes.

Use hexo-admin for management
Install hexo-admin
npm i hexo-admin -S
Run the command
hexo s -d
Access it through localhost:4000/admin If you want to use deploy in hexo-admin, you only need to configure it in _config.yml
admin:
	deployCommand: './hexo-deploy.sh'
hexo-abbrlink for permanent links
Before modification, the link looks like this

Once we modify the publication date of the article, the link will become invalid.
To solve this, we can use hexo-abbrlink
First, install it
npm i hexo-abbrlink -S
Modify the configuration in _config.yml
permalink: posts/:abbrlink/
abbrlink:
  alg: crc32
  rep: hex
For detailed configuration, you can refer to the hexo-abbrlink official website
Of course, if you want the link to be the same as your title, you don't need to install the hexo-abbrlink plugin, just modify the configuration
permalink: posts/:title
Add nofollow to external links
Use hexo-filter-nofollow to automatically add the nofollow attribute to external links to prevent them from lowering the SEO weight of the website.
Automatic search engine URL upload
Use the plugin hexo-submit-urls-to-search-engine
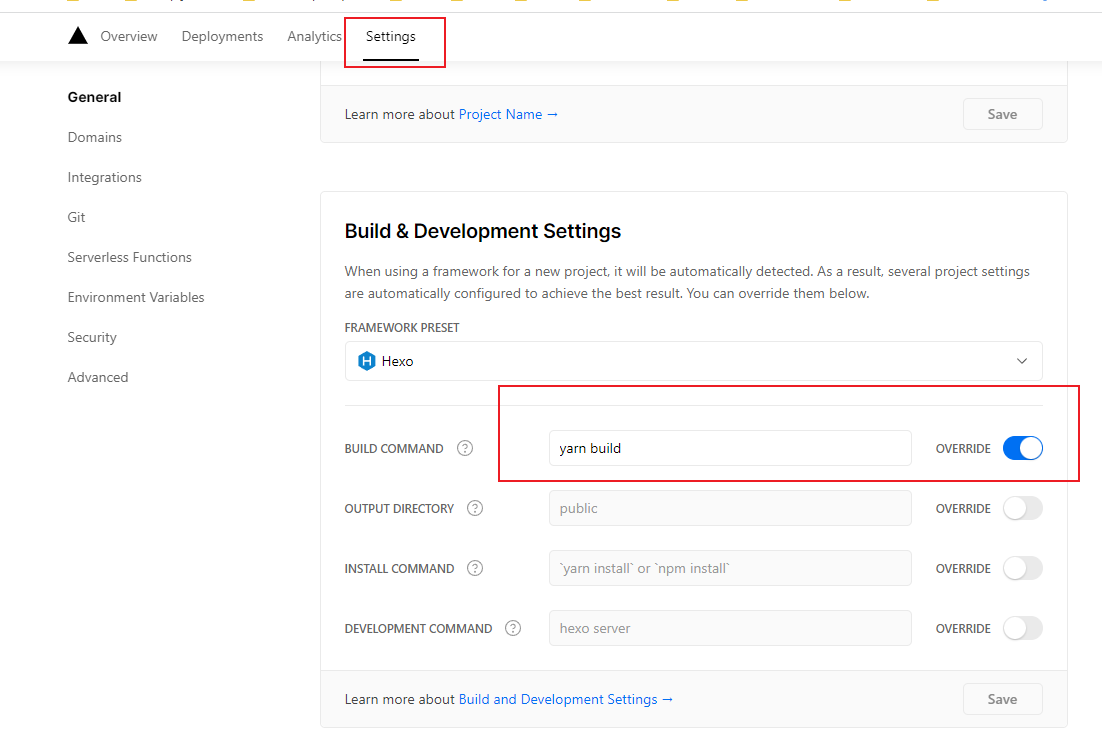
Deploy Hexo using Vercel
Currently, the access speed of Vercel in China is already very good, and since github page prohibits Baidu crawlers, I have moved from the previous github page deployment to Vercel deployment.
Since Vercel has the built-in hexo template, you don't need to type a lot of commands every time you deploy as before.
hexo clean
hexo g
hexo d
Configure package.json
  "scripts": {
    "build": "hexo generate && yarn deploy",
    "deploy": "hexo deploy",
  },
Vercel Configuration
After finishing writing an article, simply push the code and it will be deployed automatically.
TODO
- Optimize SEO
- Fine-tune styles
- Remove plug-ins that slow down loading speed
- Use CDN
404 Page after hexo d Deployment
When I deployed on a Mac, I encountered a 404 page issue. After comparing and troubleshooting, I found that it was caused by the Node version. Therefore, using the corresponding Node version will solve the problem.